如下,一台完全新开的阿里云ECS,废话不多说,直接开干了。
一、初始化服务器
1、各种内核参数修改,关闭selinux和防火墙,这里不详说
2、安装自己常用的软件
[root@LinuxNB ~]# yum -y install gcc gcc-c++ vim screen lrzsz net-tools wget curl unzip zip dos2unix rsync
二、安装openresty(当然也可以使用nginx然后安装lua扩展)
1、安装openresty必要的包(别管这里是否重复,这几个包是openresty必要的包)
[root@LinuxNB ~]# yum -y install pcre-devel openssl-devel gcc curl
2、下载yum工具
[root@LinuxNB ~]# yum install -y yum-utils
3、添加openresty的官方yum源
[root@LinuxNB ~]# yum-config-manager --add-repo https://openresty.org/package/centos/openresty.repo
4、安装openresty
[root@LinuxNB ~]# yum install -y openresty
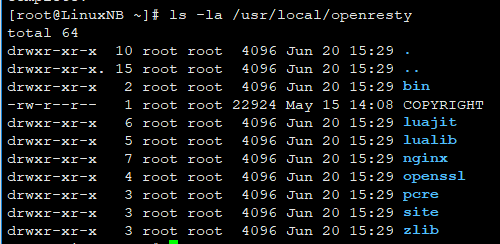
5、安装完之后软件的目录在/usr/local/openresty,如下图
三、nginx初始化工作
1、修改nginx.conf(内容如下)
核心点就是下面的 include conf.d/*.conf;

worker_processes  1;
events {
    worker_connections  1024;
}
http {
    include       mime.types;
    default_type  application/octet-stream;
    sendfile        on;
    keepalive_timeout  65;
    include   conf.d/*.conf;
}
2、新建3个子配置文件
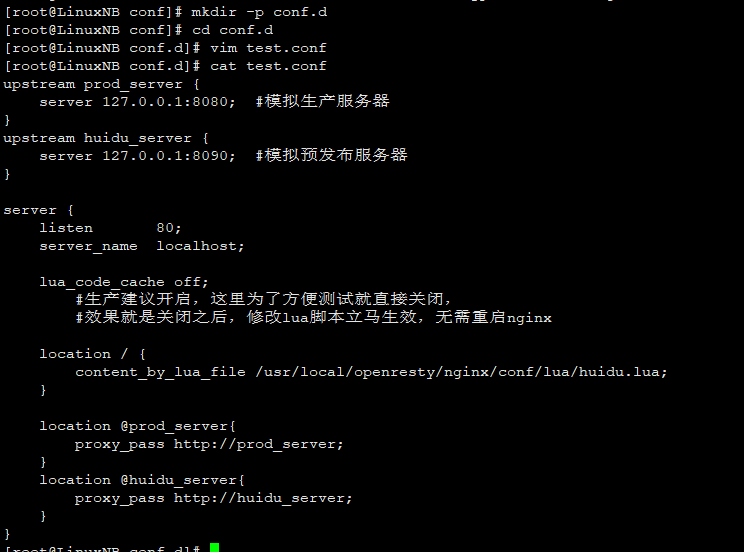
①新建子配置文件,顺便新建lua脚本存放目录,内容如下
mkdir -p /usr/local/openresty/nginx/conf/conf.d
mkdir -p /usr/local/openresty/nginx/conf/lua
vim /usr/local/openresty/nginx/conf/conf.d/test.conf
upstream prod_server {
    server 127.0.0.1:8080;  #模拟生产服务器
}
upstream huidu_server {
    server 127.0.0.1:8090;  #模拟预发布服务器
}
server {
    listen       80;
    server_name  localhost;

    lua_code_cache off;
#生产建议开启,这里为了方便测试就直接关闭,
#效果就是关闭之后,修改lua脚本立马生效,无需重启nginx

    location / {
        content_by_lua_file /usr/local/openresty/nginx/conf/lua/huidu.lua;
    }

    location @prod_server{
        proxy_pass http://prod_server;
    }
    location @huidu_server{
        proxy_pass http://huidu_server;
    }
}
②新建另外两个后端服务站点的自配置文件
vim /usr/local/openresty/nginx/conf/conf.d/prod.conf
server {
    listen       8080;
    server_name  localhost;
    root   /wwwroot/wwwprod;
    index  index.html index.htm;
}
vim /usr/local/openresty/nginx/conf/conf.d/huidu.conf
server {
    listen       8090;
    server_name  localhost;
    root   /wwwroot/wwwhuidu;
    index  index.html index.htm;
}
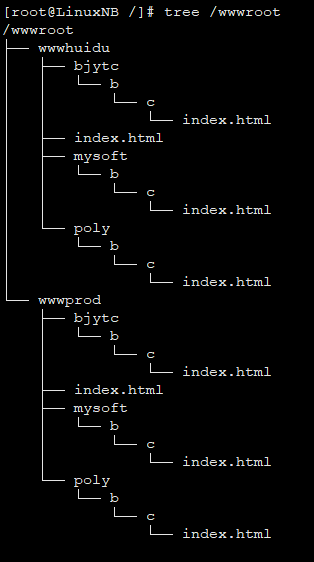
③新建测试网页,结构如下,
其中wwwhuidu目录每一级目录下的index.html的内容都为huidu
其中wwwprod目录每一级目录下的index.html的内容都为prod
四、真正配置实现灰度环境(分别根据cookie,url层级,参数,远程访问ip来实现灰度)
开始写lua脚本,lua脚本地址,所有lua脚本都在这里 /usr/local/openresty/nginx/conf/lua
①根据cookie来访问
vim /usr/local/openresty/nginx/conf/lua/huidu.lua
--设置 cookies
--ngx.header["Set-Cookie"] = "huidu=yes; Path=/; Expires=" ..
--ngx.cookie_time(ngx.time() + 86400)
-- 获取一个cookies, cookies的name叫做huidu
local cookie_name = "cookie_huidu"
-- ngx.say(ngx.var[cookie_name])
-- 需要事先约定好cookie为huidu的值
-- 1、当huidu的值为yes转发到灰度机器
-- 2、排除第一种情况,其余情况全部转发到生产机器
--    ①当huidu的值为no或者当名为huidu的cookie不存在
if not ngx.var[cookie_name] then
    ngx.exec("@prod_server")
    return
end
if ngx.var[cookie_name] == "yes" then
    ngx.exec("@huidu_server")
    return
else
    ngx.exec("@prod_server")
    return
end
ngx.exec("@prod_server")
local ok, err = cache:close()

if not ok then
    ngx.say("failed to close:", err)
    return
end
启动nginx
[root@LinuxNB /]# /usr/local/openresty/nginx/sbin/nginx
nginx: [alert] lua_code_cache is off; this will hurt performance in /usr/local/openresty/nginx/conf/conf.d/test.conf:12
此提示是那个lua脚本不缓存的,无需理会
访问服务器(此时没有设置cookie) http://47.96.99.55/mysoft/b/c/index.html
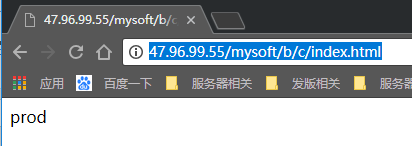
接下来我们设置一个cookie(当然cookie要事先和开发确定好,此处就按lua脚本来设置了)
cookie的键为 huidu,值为 yes
使用chrome浏览器,安装EditCookie插件(chrome网上应用店直接搜索安装)(如果不能翻墙,那就自己去想办法吧)
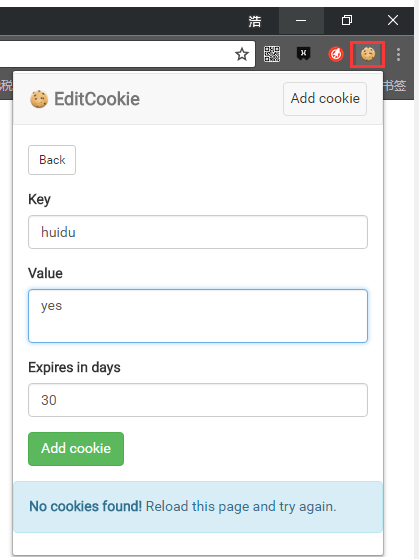
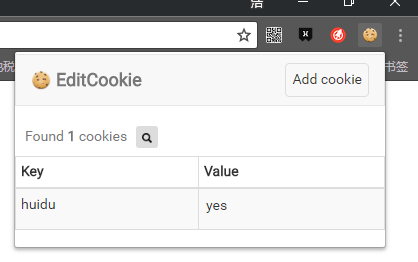
接下来我们再次刷新页面,会发现访问结果已经变了
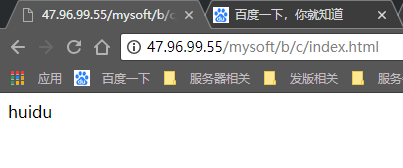
好啦,到这里根据cookie来设置灰度环境分流就完成了,实施难点(需要开发规范统一这个预先约定的cookie)
②根据url的层级来访问(难点:需要开发统一url规则)
vim /usr/local/openresty/nginx/conf/lua/huidu.lua
-- 将url后半部分根据/转换成数组(第一种方法)
--[[
function string.split(input,delimiter)
    input = tostring(input)
    delimiter = tostring(delimiter)
    if (delimiter == '') then return false end
    local pos,arr = 0,{}
    for st,sp in function() return string.find(input,delimiter,pos,true) end do
        table.insert(arr,string.sub(input,pos,st - 1))
        pos = sp + 1
    end
    table.insert(arr,string.sub(input,pos))
    return arr
end
]]
-- 将url后半部分根据/转换成数组(第二种方法)
function split(str,reps)
    local arr = {}
    string.gsub(str,'[^'..reps..']+',function(w)
        table.insert(arr,w)
    end)
    return arr
end
-- local request_uri = ngx.var.request_uri
-- 获取URI,获取的结果为此样例(带参数):"/a/b/c/index.html?a=b&c=d"
-- 获取uri
local uri_no_args = ngx.var.uri
-- 获取URI,获取的结果为此样例(不带参数):"/a/b/c/index.html"
local res_arr = split(uri_no_args,"/")
-- 将uri_no_args字符串转换成数组
-- ngx.say("long is number:",table.getn(res_arr))
-- table.getn(res_arr)方法获取数组的长度
-- ngx.say(res_arr[1])
--注意:lua的数组下表是从1开始,而其它大部分语言是从0开始
--判断一个字符串是否在一个数组里面
function str_in_array(str,list)
    if not list then
       return false
    end
    if list then
       for k, v in pairs(list) do
           if v == str then
              return true
           end
       end
   return false
    end
end
-- 事先定义好需要灰度的租户code
tenant_code = {"mysoft","bjytc"}
--假设uri第一根斜杠/后面就是租户code
if str_in_array(res_arr[1],tenant_code) then
    ngx.exec("@huidu_server")
    return
else
    ngx.exec("@prod_server")
    return
end
ngx.exec("@prod_server")
http://47.96.99.55/poly/b/c/index.html
http://47.96.99.55/mysoft/b/c/index.html
http://47.96.99.55/bjytc/b/c/index.html
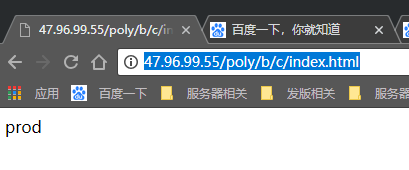
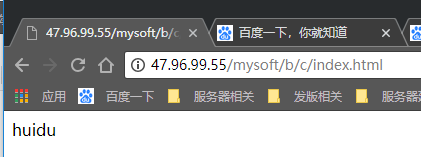
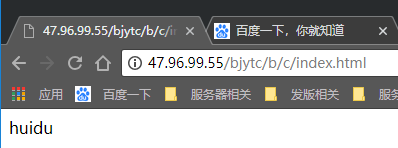
由于我们在脚本里面定义了mysoft和bjytc要走灰度,所以目的达到。
此处我们使用的是域名后面的第一条斜杠之后的第一个层级的值来判断
如果是第二个或者第三个,只需要修改脚本里面那个数组的小标即可
注意:lua脚本数组下标从1开始
③根据url上面的参数来访问(难点:需要开发统一参数规则)
vim /usr/local/openresty/nginx/conf/lua/huidu.lua
function Split(szFullString, szSeparator)
        local nFindStartIndex = 1
        local nSplitIndex = 1
        local nSplitArray = {}
        while true do
        local nFindLastIndex = string.find(szFullString, szSeparator, nFindStartIndex)
        if not nFindLastIndex then
                nSplitArray[nSplitIndex] = string.sub(szFullString, nFindStartIndex, string.len(szFullString))
                break
        end
        nSplitArray[nSplitIndex] = string.sub(szFullString, nFindStartIndex, nFindLastIndex - 1)
        nFindStartIndex = nFindLastIndex + string.len(szSeparator)
        nSplitIndex = nSplitIndex + 1
        end
        return nSplitArray
end
function parseUrl(url)
    local t1 = nil
    --,
    t1= Split(url,',')
    --?
    url = t1[1]
    t1=Split(t1[1],'?')
    url=t1[2]
    --&
    t1=Split(t1[2],'&')
    local res = {}
    for k,v in pairs(t1) do
        i = 1
        t1 = Split(v,'=')
        res[t1[1]]={}
        res[t1[1]]=t1[2]
        i=i+1
    end
    return res
end
-- 事先定义好灰度的key和value
is_huidu = "yes"
local request_uri = ngx.var.request_uri
res = parseUrl(request_uri)
--ngx.say(res.is_huidu)
--return
if res.is_huidu == is_huidu then
    ngx.exec("@huidu_server")
    return
else
    ngx.exec("@prod_server")
    return
end
假设定义参数key为is_huidu,值是yes
http://47.96.99.55/bjytc/b/c/index.html?a=b&c=d&is_huidu=yes
http://47.96.99.55/bjytc/b/c/index.html?a=b&c=d&is_huidu=no
http://47.96.99.55/bjytc/b/c/index.html?a=b&c=d


④根据访问ip来判断
1、一般是为了解决地域问题,将不同地域的请求转发至不同的后端,可以使用geoip模块,这里不详说
2、另外可以直接购买使用dns服务,dns服务会将不同地域的请求转发至不同的服务器
vim /usr/local/openresty/nginx/conf/lua/huidu.lua
local local_ip = ngx.req.get_headers()["X-Real-IP"]
if local_ip == nil then
    local_ip = ngx.req.get_headers()["x_forwarded_for"]
end
if local_ip == nil then
    local_ip = ngx.var.remote_addr
end
--ngx.say("local_ip is : ", local_ip)
--判断一个字符串是否在一个数组里面
function str_in_array(str,list)
    if not list then
       return false
    end
    if list then
       for k, v in pairs(list) do
           if v == str then
              return true
           end
       end
   return false
    end
end
-- 事先定义好需要灰度的租户code
huidu_ip_list = {"192.168.1.101","192.168.1.189"}
if str_in_array(local_ip,huidu_ip_list) then
    ngx.exec("@huidu_server")
    return
else
    ngx.exec("@prod_server")
    return
end
ngx.exec("@prod_server")
如果访问者的ip在列表里面,那么将访问灰度环境,此文档使用的是公司网络,为了不暴露公司外网ip,此处就忽略掉了

如果访问ip不在列表里面将会走生产环境
⑤接下来,结合redis来做控制,以第③点为基础进行修改,把将来可能会变动的东西存入redis
安装redis并启动redis(这里默认不要密码)
[root@LinuxNB lua]# yum -y install redis
[root@LinuxNB lua]# systemctl start redis
vim /usr/local/openresty/nginx/conf/lua/huidu.lua
local redis = require "resty.redis"
local cache = redis.new()
cache:set_timeout(60000)
local ok, err = cache.connect(cache, '127.0.0.1', 6379)
if not ok then
    ngx.say("failed to connect:", err)
    return
end
--[[
-- 如果redis有密码,就把此段放开,
-- 另外具体连接redis几号数据库,暂时还没找到方法
local red, err = cache:auth("redis_password")
if not red then
    ngx.say("failed to authenticate: ", err)
    return
end
]]
function split(str,reps)
    local arr = {}
    string.gsub(str,'[^'..reps..']+',function(w)
        table.insert(arr,w)
    end)
    return arr
end
local uri_no_args = ngx.var.uri
local res_arr = split(uri_no_args,"/")
local huidu = cache:get(res_arr[1])
-- ngx.say(res_arr[1])
-- ngx.say(huidu)
if huidu == "yes" then
    ngx.exec("@huidu_server")
    return
else
    ngx.exec("@prod_server")
    return
end
-- tenant_code = {"mysoft","bjytc"}
-- 接下来我们将此内容放入redis里面来判断,以后就可以直接操作redis就可以达到变更灰度范围的功能
首先我们直接访问
http://47.96.99.55/mysoft/b/c/index.html?a=b&c=d

接下来我们在redis里面添加mysoft,然后再次访问


完事,当然还需要去研究下lua脚本,所有功能都是lua脚本实现的。
既然数据可以存到redis里面,那么接下来就可以实现各种复杂多层的控制了,甚至如果有开发资源的话,可以弄个网页专门管理这个redis的值从而动态的影响灰度范围
当脚本完成编写后,nginx应该开启lua脚本缓存:lua_code_cache on;
实验完成,释放此ECS实例,此ecs实例已释放。
-
nginx实现tcp反向代理,端口转发,负载均衡
:下一篇 »